

Are you curious about how to build a chatbot using FastAPI? You’re in the right place! In this beginner-friendly tutorial, we’ll walk through creating a simple chatbot using Python’s FastAPI framework. Whether you’re new to backend development or just starting your AI journey, this guide is designed to make your experience smooth and fun.
What You’ll Build
We’ll build a lightweight chatbot that can respond to a set of predefined questions using a simple REST API. Think of it like a mini version of ChatGPT – but way easier and faster to deploy.
Prerequisites
Before we begin, make sure you have the following installed on your system:
- Python 3.7+
- Terminal
- Basic knowledge of Python
- Basic knowledge of FastAPI
- Visual Studio Code (VS Code) – optional but recommended
Tip: If you want to learn how to build a simple chatbot using just Python (no web framework), check out this guide: Build a Simple Python Chatbot
Step 1: Set Up Your Project Folder
First, open termianl and create a new directory for your project:
mkdir chatbot_fastapi
cd chatbot_fastapi
Step 2: Create a Virtual Environment
Let’s isolate our project dependencies using Python’s venv module:
python3 -m venv venv
source venv/bin/activate 
Step 3: Install FastAPI
Install FastAPI :
pip install "fastapi[standard]"
Then, freeze your dependencies:
pip freeze > requirements.txtStep 4: Create Your Main Application
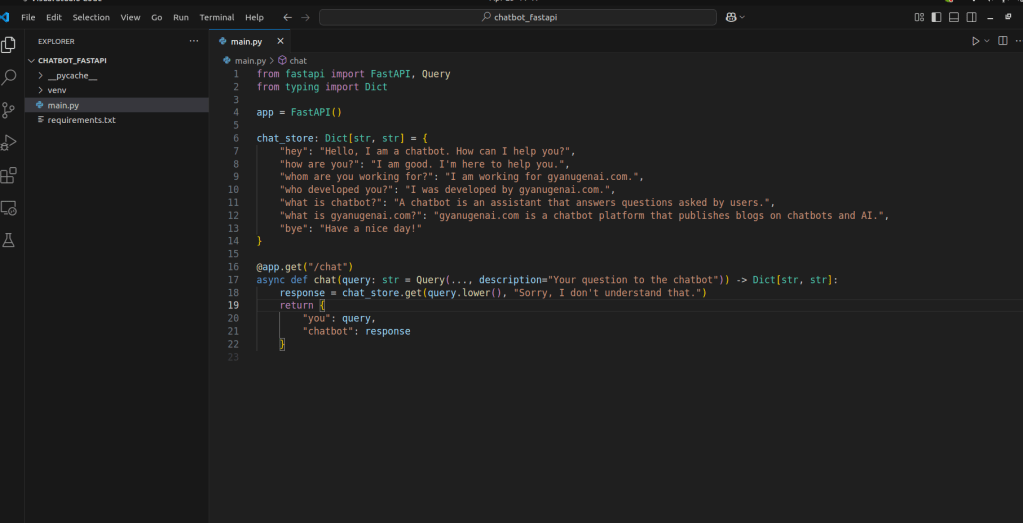
Create a file named main.py and paste the following code:
from fastapi import FastAPI, Query
from typing import Dict

app = FastAPI()

chat_store: Dict[str, str] = {
    "hey": "Hello, I am a chatbot. How can I help you?",
    "how are you?": "I am good. I'm here to help you.",
    "whom are you working for?": "I am working for gyanugenai.com.",
    "who developed you?": "I was developed by gyanugenai.com.",
    "what is chatbot?": "A chatbot is an assistant that answers questions asked by users.",
    "what is gyanugenai.com?": "gyanugenai.com is a chatbot platform that publishes blogs on chatbots and AI.",
    "bye": "Have a nice day!"
}

@app.get("/chat")
async def chat(query: str = Query(..., description="Your question to the chatbot")) -> Dict[str, str]:
    response = chat_store.get(query.lower(), "Sorry, I don't understand that.")
    return {
        "you": query,
        "chatbot": response
    }
Step 5: Run Your FastAPI Server
To start your development server, run the following command:
fastapi dev main.py
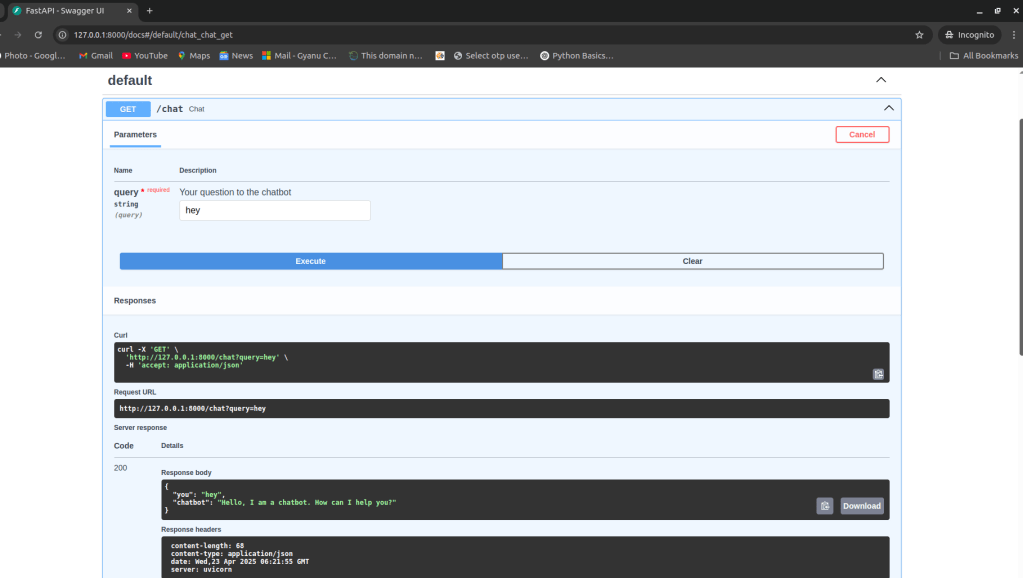
Visit your browser at http://127.0.0.1:8000/docs – this opens the Swagger UI where you can test your chatbot!
How It Works
In the Swagger UI, you’ll see a GET method for /chat. Click “Try it out”, enter a question like:
heywho developed you?what is chatbot?
And click on execute, you’ll get an instant JSON response from your chatbot!
If the query isn’t in chat_store, you’ll get a default response:
“Sorry, I don’t understand that.”


And there you go – you’ve just created your very first chatbot using FastAPI! This project is great for beginners who want to learn API development, and it’s a solid foundation to build more advanced AI applications in the future.


Leave a comment